Just melt some wax and pour it in a glass, right? It's that simple? No!
It turns out that making the perfect scented candle is actually...science.
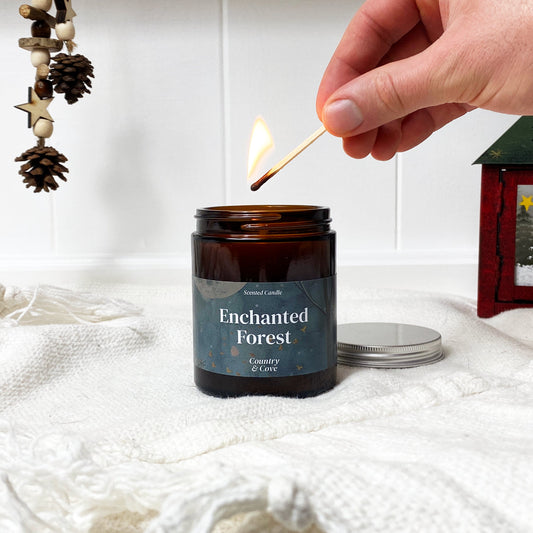
Let's dive in to a behind the scenes look at how me make scented candles at Country & Cove.
Note: This is NOT a definitive candle making guide and is intended as a 'behind the scenes' highlight from our candle studio. You MUST make sure you follow safety guidelines when handling fragrance oils. NEVER make candles in a room frequented by children or animals. Many fragrance oils have their own warning labels, which must be adhered to at all times. NEVER make candles in a food preparation area or use food related utensils - you must only use tools and equipment intended for candle making. Fragrance oils and waxes may carry allergens and toxins which could be harmful to people and animals. Please read all packaging instructions and check with your supplier BEFORE ever trying to make a product.
ROOM TEMPERATURE
The first thing we check in the morning, the wall thermometer! Why? Because our candles are made using a soy wax that is natural, meaning it's susceptible to changing temperatures and, in the UK, the room temperature can fluctuate massively through-out the day.
We aim for our studio to be between 18 and 22 degrees, any cooler than this and we have to switch the heating on. Any hotter and we have to open some windows and doors, before we commence. These have to be closed during the curing process but more on that later..
CONTAINER PREP
After confirming the room is at the right temperature, we get all our tools and equipment prepped and ready for the day ahead. Wicks, check. Stickums, check. Thermometer, check. You get the idea.
Then, if we haven't already done this and if it's necessary, we will hand wash our glass candle containers with warm water (no soap). This removes any dust and residue, so we have a nice clean, fresh glass for the soy wax to adhere to. Candle tins are wiped clean with a dry cloth, we don't want any droplets of water to interact with our wax! Glasses are then placed over a drying rack for around 1 hour, then wiped clean to remove any water marks.
At this point, we'll probably get some wax warming in the boilers, as it can take an hour or so to melt fully. While that's going on, we prep all of our cotton wicks and confirm how many orders we need to complete for the day.
BOILING POINT
One thing you definitely don't need to think about when making our candles is 'boiling point'. If you've got that far, the wax is probably burnt and not usable.
Our eco soy wax is warmed gradually over the course of one or two hours, reaching between 70 and 80 degrees before we withdraw from the heat and allow to cool.
While the wax is cooling to the correct blending temperature (as dictated to by our wax supplier) we begin the process of 'wicking' all of our candles, so they are all poured at the same time. This is why preparation is so important!
At Country & Cove, we use self-trimming cotton wicks. These are really handy for our customers, as you don't need to trim your wick at any point!
STIRRING THE POT
As soon as our candle wax has hit the required blending temperature, we decant in to the pouring jug. Then, we begin blending all of the fragrance oils in with the wax. This is most definitely science, as we need the fragrance oil to bind fully with the wax. As wax cools, it begins to crystallise and this can reduce the chance of effective particle binding. We MUST get our temperatures correct and ensure we are carefully stirring the fragrance oil from the bottom to the top of the pouring jug. We will stir for between 2 and 3 minutes, depending on the size of the container and the fragrance oils within. This process is best done by hand, as you cannot use machinery that would 'froth' the wax. Bubbles are the enemy! Once stirred, we carry out another temperature check, depending on the documentation provided by our supplier, it may just be the right time to pour!
A DELICATE POUR
Once we have reached the required pouring temperature, we then begin the pour process, placing each candle glass on to digital scales, pouring to the required temperature and then gently placing on the cooling racks, so that the glasses/tins cool evenly all the way round. You don't want a soggy bottom!
Some candle makers leave a little gap at the top of their candles when pouring, retaining maybe a 5th of the wax in the pouring jug. This is so they can go around at the end, topping the candles up a little, to give them a silky smooth top. Natural soy wax has no or very few additives, so there's nothing to stop it collapsing like a soufflé in the middle or developing air bubbles as it starts to set.
Some natural, mineral waxes dry with an uneven surface and have a non-uniform crystallising process which leads to uneven and non smooth candle tops. At Country & Cove, we've selected a specific soy wax that we use for ALL our candles. Luckily, we've got our temperatures just right to allow us to pour in one go, and produce smooth tops almost every time!
To ensure our candle tops don't go wobbly, we have to make sure any windows and doors have been closed. Windy conditions are not ideal for candle making, as the wax will start setting against the coolest side of the candle glass first, creating a wonky curing profile, which is certainly not our idea of perfection.
CURING TIME
The curing time of soy wax candles varies but we usually allow 5 full working days for our candles to cure on the drying racks. We won't pack or post any of these candles until they're fully set in their containers and are producing an amazing cold throw that fills our studio with magical scent!
After 5 working days, the candles are ready to have their wicks trimmed and labels added. They are then placed in gift boxes and placed on our shelves ready for picking and packing to customers and retail shops across the UK.
By the time a scented candle reaches your doorstep, it will have been cured for over 7 days and should be ready to light. For extra hot throw strength, we recommend leaving your candles in a room for a few days, this allows the candle wax to settle even more, depending on how warm your living spaces are. We've found the longer you leave a soy wax candle, the stronger the scent gets.
In fact, some of our customers have mentioned that they don't actually have to light their Country & Cove candles at all. The cold throw gets stronger over time and, if they leave the candle in the room, it gently fills the space with a light aroma. No flame required!
So, there you have it. A quick guide to the science of candle making. There's obviously a lot more to it, depending on your fragrance oils, the wax you use, the container types...it's a huge industry with lots of niches and there are candle makers who have been doing this for decades, creating new methods and even their own fragrances!
Still interested in becoming an artisan candle maker? Why not try a candle making course - there are dozens around and you can learn lots of new things, including working with essential oils, what size wicks to use for your containers and even things like CLP safety labelling and the testing you have to undertake to keep your candles (and customers) safe.
Don't forget! When making candles, you may have to adhere to certain safety regulations and labelling requirements, so please research thoroughly before undertaking any form of product manufacturing, even if you just make one item! Fragrance oils, wax boilers, they all have individually safety notices and you must make sure you fully understand the making process and any safety requirements BEFORE getting started.